To catch the rest of this series, click here.
I love my laminator. Really! Unfortunately my laminator has also made me a laminator snob. Once you have discovered the power of 7 ml laminate, it’s really hard to go back to 1.5. It’s also an expensive habit to have. Let me share my addiction.
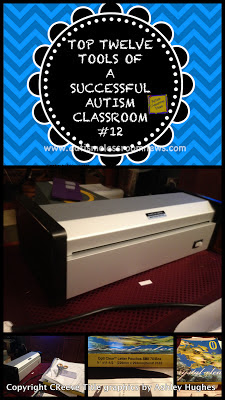
I have a heavy duty laminator from USI (the picture to the left) and I typically order my laminate from them as well. I love their Opti-Clear because it’s crystal clear and durable. Most school laminators are 1.5 mil. Many pouch laminators will laminate up to 3 mil. My laminator will laminate up to 10 mil. Yes, I said it–10 mil. I actually don’t use 10 mil much because it’s too stiff and sharp for most things, but it does work very well for making boards for communication systems and schedules. Mostly I use 5 mil for anything that kids don’t use and 7 mil for anything that they do. The 7 mil needs to have the corners rounded because it can get sharp, but that stuff lasts like you wouldn’t believe and doesn’t get all bent up like the thinner laminate.
I know many teachers really like the Scotch laminator like the one at the bottom of this post and it will take up to 5 mil laminate.
So, given that my laminating addiction is an expensive habit to have, I always want to make sure that I am saving as much film as I can. Here are some ways to do that and to make sure that the laminated items last.
1. Cut out the pieces you want to laminate first before you laminate them. I realize this means you have to cut them twice, but it keeps them from peeling like they will if you don’t have a good seam heat sealed in between the pieces.
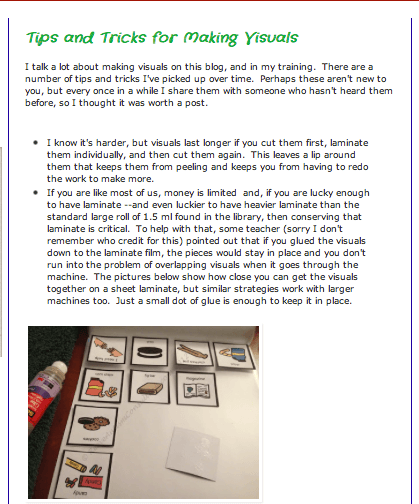
2. Glue the smaller pieces to the laminating film with a small dot of glue or glue stick. This means you can position them closer together and not have them overlap when they go through the machine. For an example of this, see this post.
3. If you have less than a page of things to laminate, you can cut the laminate sheet to save the pieces you are aren’t using. It’s easier if you position them along one side of the laminating sheet rather than top-bottom, though, so you save part of the seam / fold for the extra piece. This keeps you from having two separated sides of the laminating film.
4. If you must use the large roll laminator at school and you are lucky enough to be able to put your own items through it (I know schools where there is a designated laminator on staff who is the only one allowed to touch the laminator), you can put small pieces through separately even on a big laminator. The secret is to put a row of cut pieces on the platform, run the laminator until you can’t see them anymore, then stop the laminator. Put another row down and repeat the process. Again, it takes a bit longer but the effort you put into it pays off in the length of time the materials last.
5. If you do use the 5 or 7 ml (or 10 ml) laminate, you may want the scissors below. I decided I could create a classroom without them, so they aren’t one of the essential 12. However, I have traveled across the country with them in my suitcase many a time because I don’t like cutting without them. Ever have your fingers go numb from all the cutting? These help with this. They are also are stronger with the spring loading so they are helpful for cutting through the heavier laminate.
Disclosure: I don’t receive any compensation from USI…I just really love their lamainator and laminate. The Amazon links are my associate links. I have used the scissors and LOVE them. The laminator and the laminate are not my usual types but I know many people who use the Scotch laminator and love it and others who have used a variety of laminate from Amazon and it has worked well for them.
So that wraps up our 12 Top Tools for a Successful Autism Classroom series. There are many other things that are needed in a classroom, but these are what I would consider the bare essentials (OK some type of laminate is essential but it doesn’t have to be to my standards). What other tools do you think are critical to a successful classroom? Any tips on lamination or any of the other tools. I know we have had a number of comments about Teflon coated scisssors (got to try those!) and places to purchase Velcro cheaply. Share the wealth if you have more helpful information about any of them. Also for full lists of needed classroom supplies for an autism classroom and lots of pictures of classrooms and the process of setting up classrooms, you can check out our book by clicking on the picture. 
Until next time,
![Summer resources to help survive the end of the year in special education [picture-interactive books with summer themes]](https://autismclassroomresources.com/wp-content/uploads/2018/05/SUMMER-RESOURCES-ROUNDUP-FEATURE-8528-768x768.jpg)