So as we continue our back to school classroom setup, you can check out other posts in this series by clicking here.
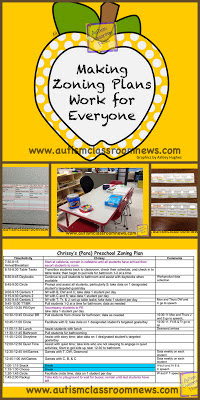
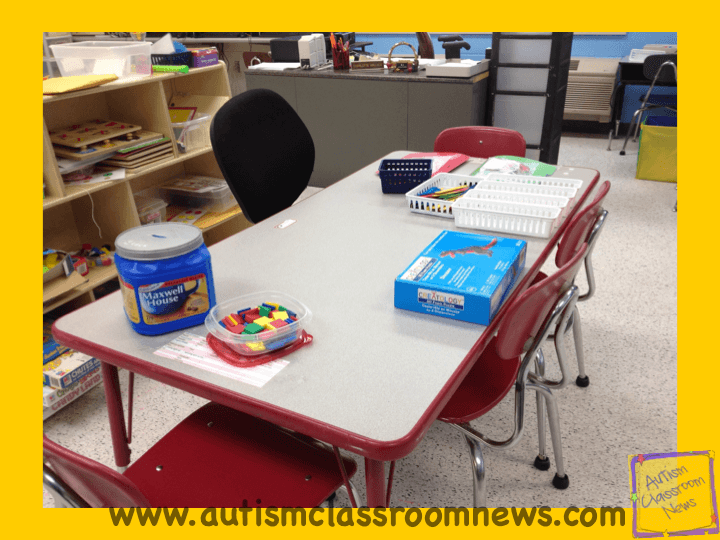
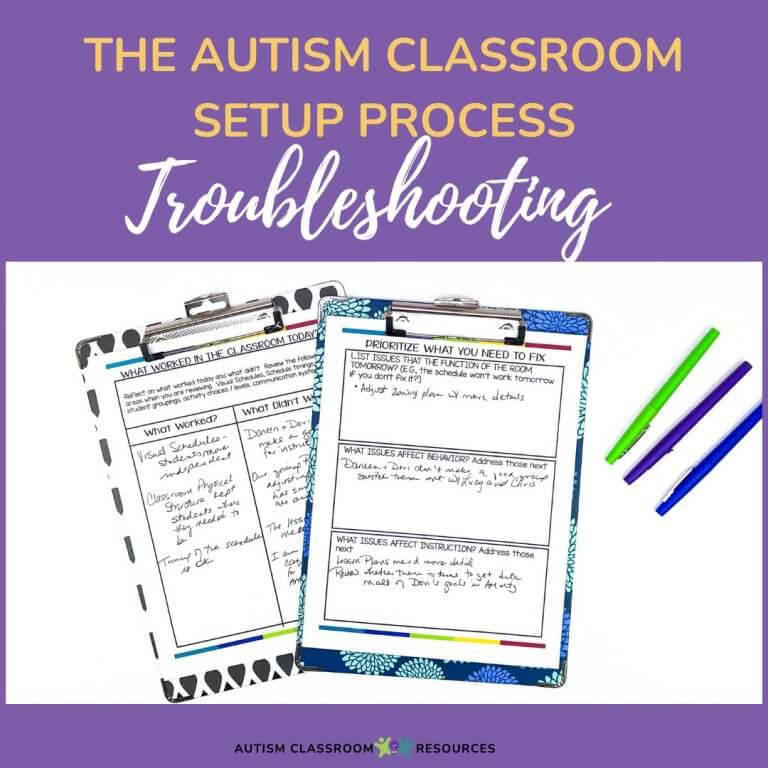
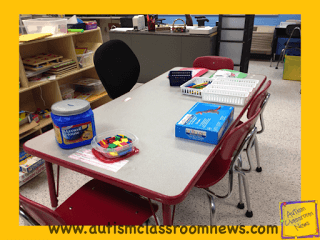
To wrap up the discussion of zoning plans, I thought I would share some ways I have used to make them accessible and easy to use for the staff. Remember that zoning plans are created to decrease downtime for the students, but if they aren’t easy for the staff to use, they won’t work. Our goal in a self-contained classroom, particularly, is to have every activity set up before the students get there, like the one below.
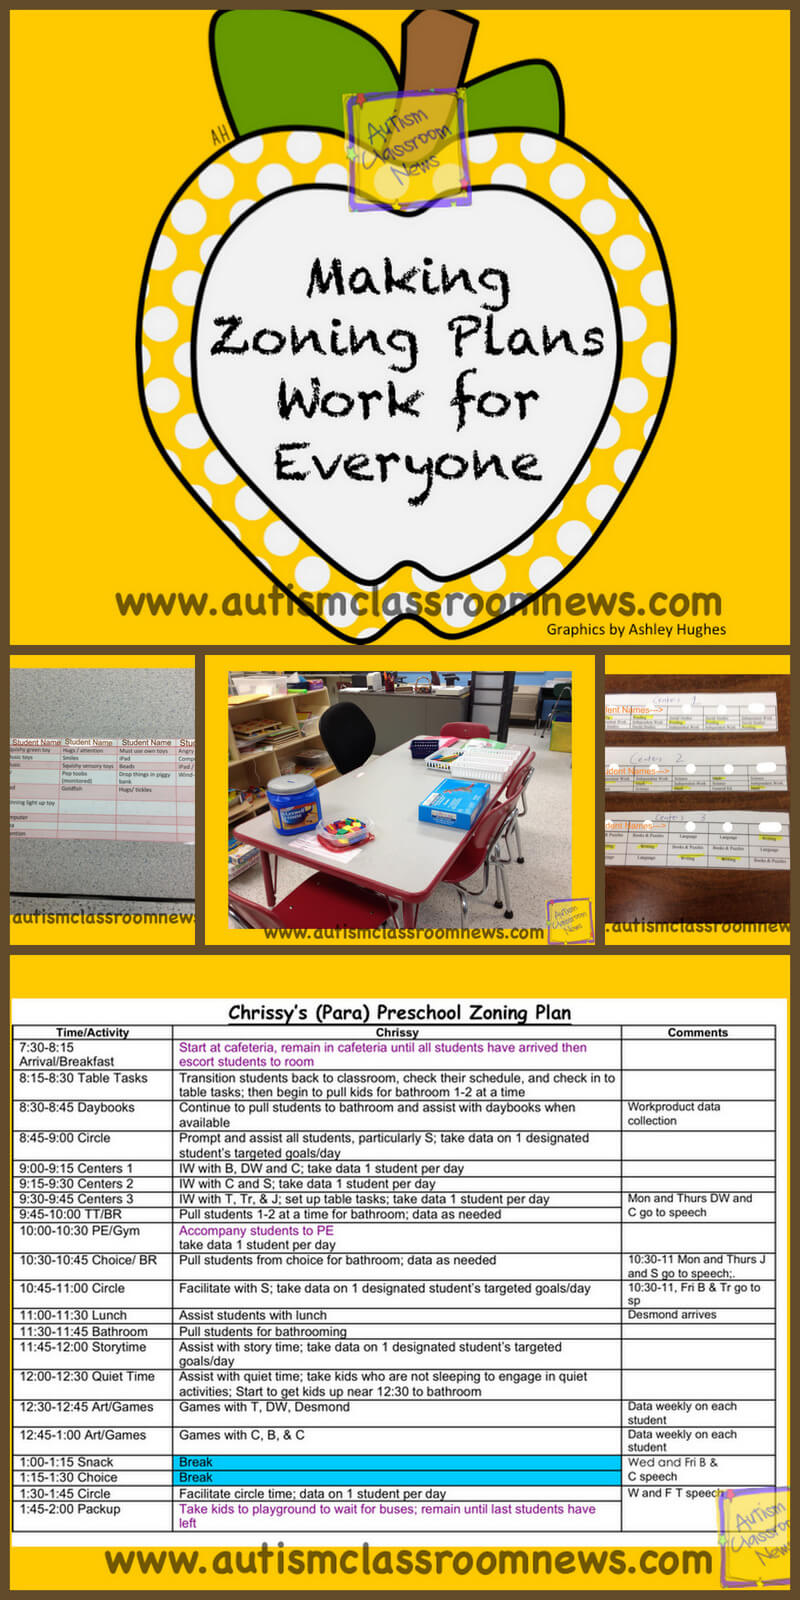
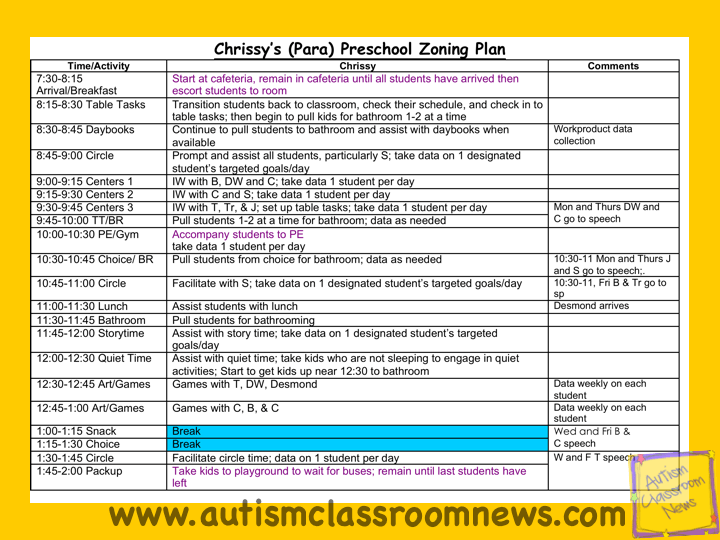
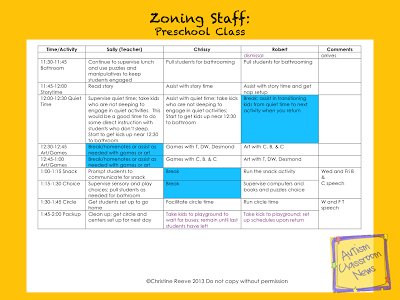
Typically my zoning plans have enough written on them so they take up more than one page–usually 2; sometimes 3 if things are complicated. Flipping through 3 pages to find out where we are on the schedule just doesn’t work for me. So to help that, I make each person on the team their own 1-page copy of the plan that they can carry. Once they get used to the schedule, they don’t need to refer to it much unless you make changes, but at first I’ve found it becomes like a lifeline. As I mentioned earlier in this series, I find staff who routinely didn’t do what was asked of them following the zoning plan exactly as it is written. Often the problem is not with the staff member but with the way the expectations have been provided. So here’s an example of a preschool zoning plan for the whole class. I managed to get this one down to 2 pages without making the print too small. As an aside, one way to alienate the “older” staff (like me) in the classroom is to make the print too small!
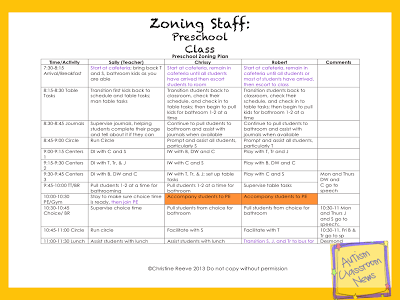
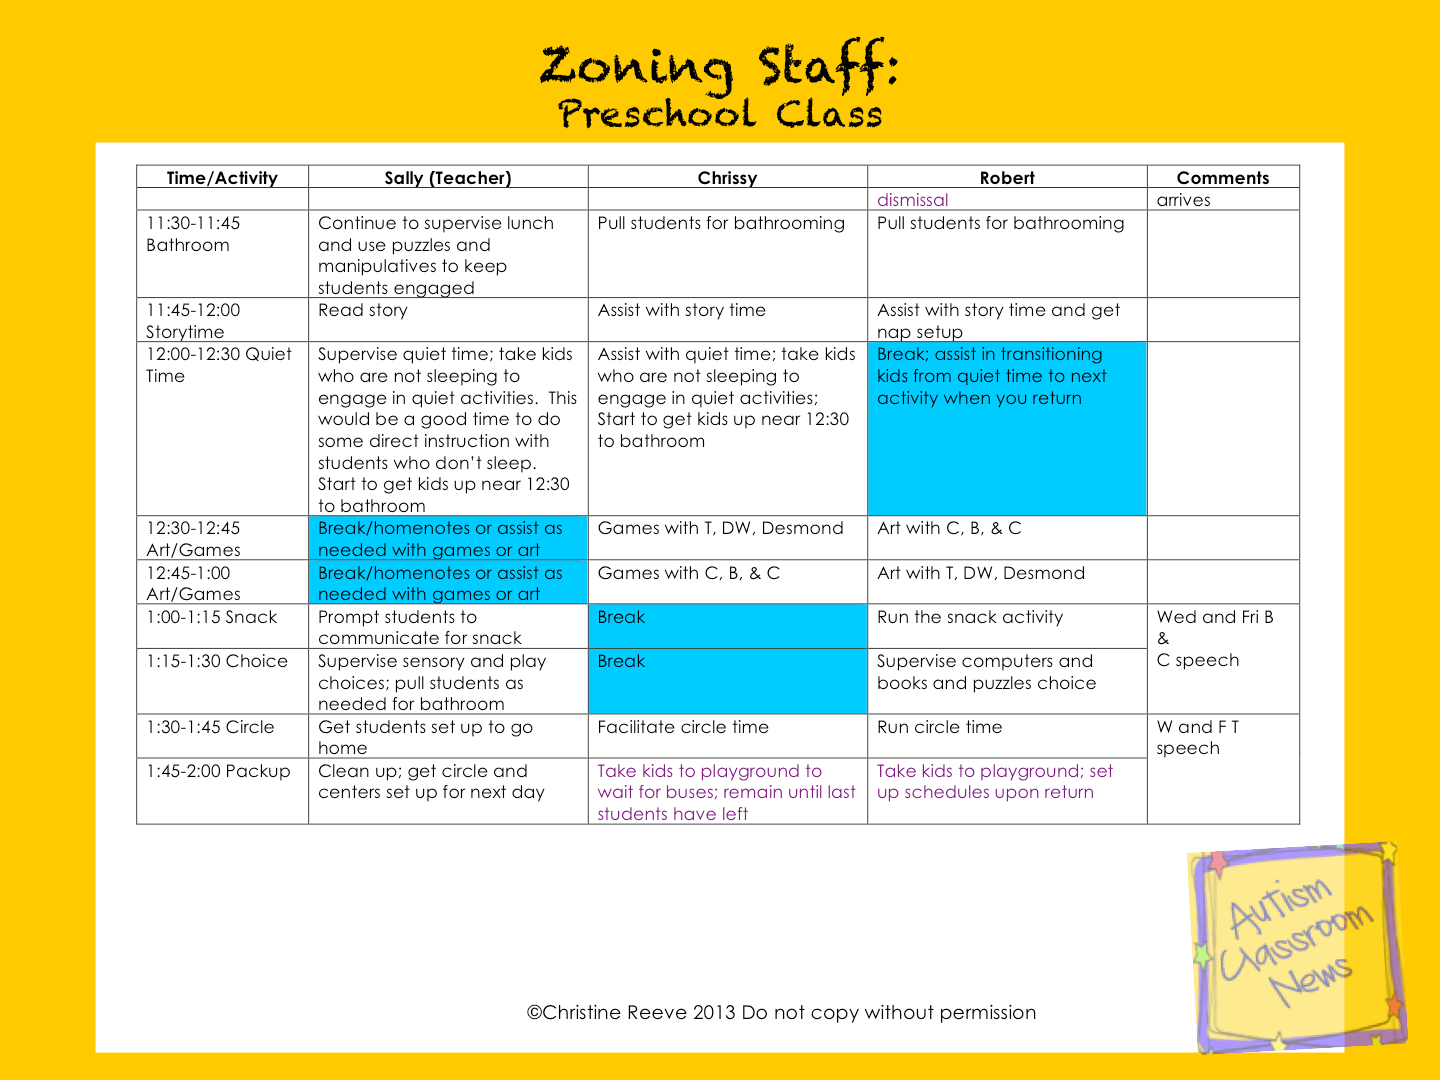
Then to make it easier for each person to use, I made each a schedule that just contained the class schedule, that person’s duties and the comments (helpful because it writes when kids are out at therapies which prevents panic when you can’t find them).
All I did was take the zoning plan and delete the teacher and other para’s columns and play around with the width of the columns so I could get it down to one page for Chrissy. Then she can fold it up and put it in her pocket and have it available for quick reference when needed.
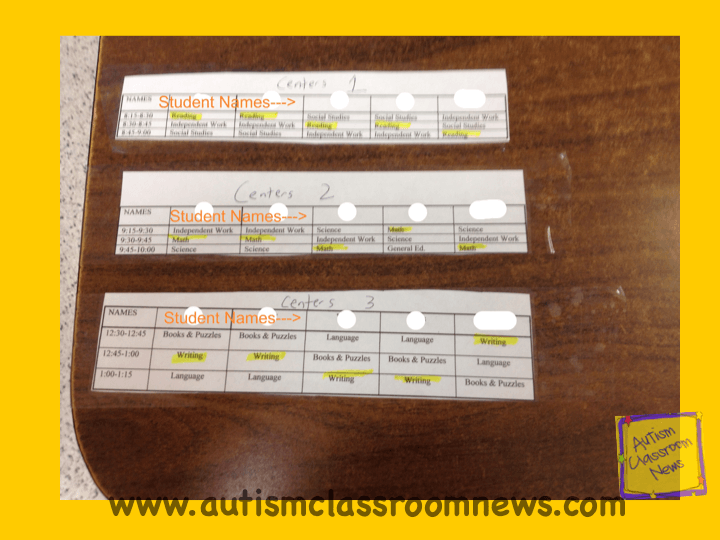
Sometimes, even this is too much to manage when trying to keep 3 kids engaged in a small group center. So in addition, I take parts of the schedule and I tape them to the tables for center time so the staff can see quickly which group is scheduled to come to them next.
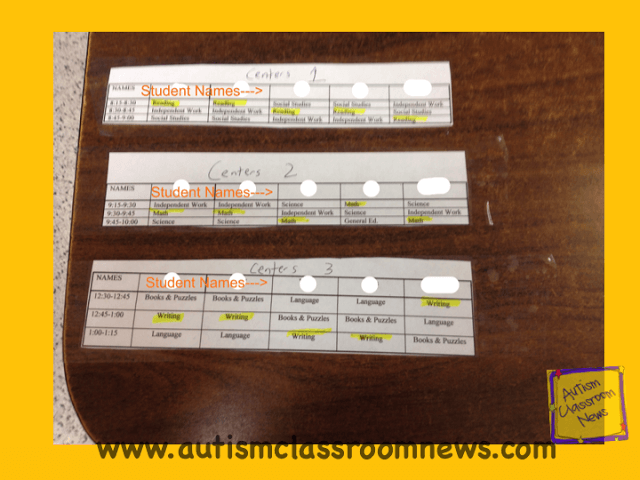
There were 3 sets of centers coming through this area during the day and each set had 3 rotations. The students’ names were put across the top and the times on the left (I just cut them out of
the schedule grid I showed earlier in the series). Then I highlighted the center I taped it in. So this area was used for Reading for the first set of centers, Math for the second, and Writing for the third. The students rotated through 2 at a time except one little guy who needed more 1-1. Sometimes I color code this easier for reference but I just didn’t have time with this class. This gets taped right where the staff sits so he or she can look down and see who is supposed to be in the center at specific times and who comes next. I have to have this to run centers, particularly with a new schedule, to preserve my sanity. And I continue to look for ways to automate things I need to check and make the classroom user friendly not just for the students but the staff as well. So I leave you with this thought and in the next post we’ll start talking about the visual supports and tasks for the room.
Until next time,