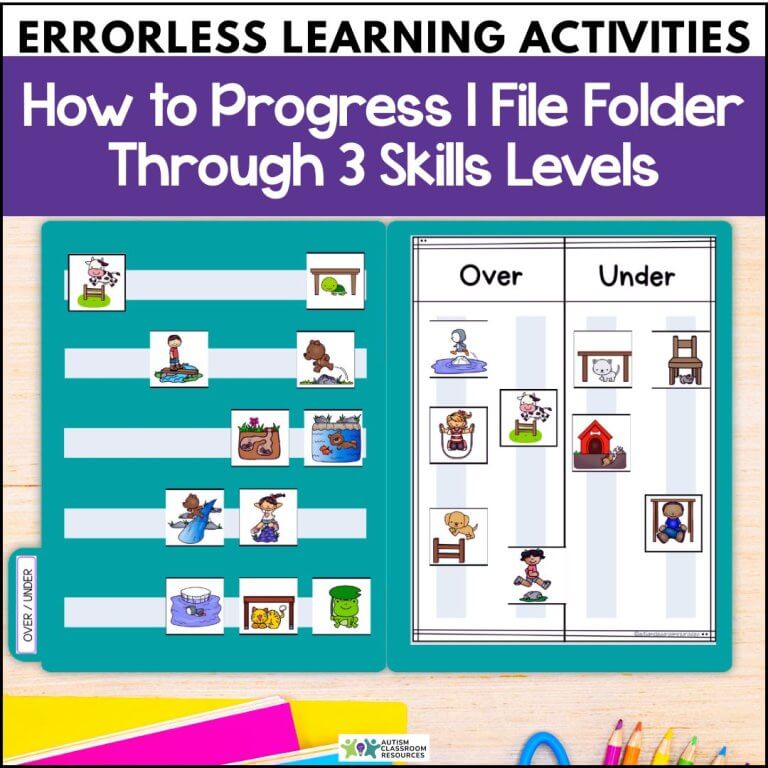
fbpx

5 Things You Need to Know About Time Delay Prompt Fading

Sharing is caring!

5 Things to Know About Time Delay Prompt Fading
Continuing on with the Effective Interventions in ABA series, the next prompting strategy I want to address is time delay.  I talked about most-to-least prompting and least-to-most prompting in previous posts.  Those work well for motor tasks, but it is harder for verbal skills, like naming items, because your primary prompt is to verbally state the answer and that’s hard to do break down into more or less intrusive prompts (other than the whole word vs. the first sound of the word).  Time delay is a strategy that works well for verbal prompts because you delay the entire prompt and don’t have to have more or less intrusive prompts (although you can combine them).  

What is Time Delay?
Time delay is where you start with an immediate prompt right after you administer the direction.  So if I’m teaching Bob to name “backpack” when I show him a backpack or picture of a backpack, I would show him the picture and immediately I would say “backpack.” If he echoes my response, he gets reinforced (more on that later in the series).  Similarly if I’m teaching Sally to point to a picture of a backpack when I have 3 pictures on the table, I would start instruction by putting the 3 pictures on the table and immediately pointing to the picture of the backpack.  Over time I would delay when I provide the prompt based on which type of time delay I have chosen to use.  In both types of common time delay procedures described below, you still prompt immediately when you begin teaching the skill until the student is reliably repeating or following the prompt you use to give you the correct response.  After that point you either provide a prompt at a consistent time period after the direction or you gradually increase the time you wait.  There are always variations within prompting procedures so these are not the only ways time delay can be implemented, but they are the most common.

Constant time delay is when I always provide a prompt a consistent time after I have given the direction.  Usually this is around 3-5 seconds and you establish it before you implement the procedure.  You still prompt immediately when you begin teaching the skill until the student is reliably repeating or following the prompt you use to give you the correct response.  After that point, using constant time delay, Sally’s example would look like this:

In progressive time delay, rather than a consistent time delay, you gradually change the amount of time, slowly increasing the delay over time.  So in the example above, the delay after giving the direction might start at 1 second and gradually increase over time until the student is more likely to give you the correct response.

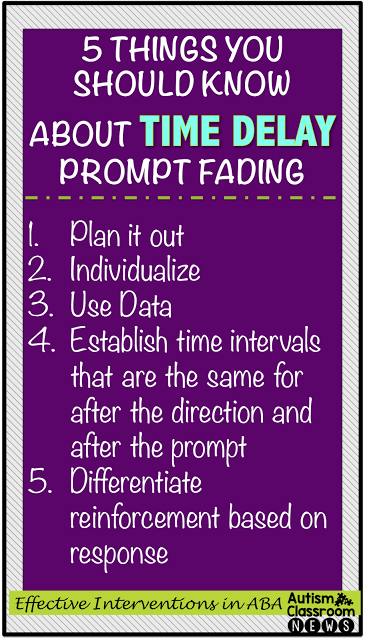
You can find out much more detailed information about both types of time delay in the National Professional Development Centers’ brief HERE.  For the purposes of this post, here are 5 things that need to be considered to use it effectively.

1.  Plan it out
It’s important to plan out which type of time delay you want to use. You would choose to use time delay when the student is likely to make a mistake if you don’t prompt immediately initially and when you have planned out the elements below to assure that all the instructors are using it consistently.


2. Individualize 
Typically you establish a set amount of time you wait based on the individual student.  If Sally is very distractible and has difficulty paying attention, my waiting time is going to be shorter.  If she is slow in processing information, it’s going to be longer.  It is important to make the decision for the length of the waiting as well as how fast you will progress in the progressive time delay based on the student’s performance.  If you get errors, your waiting is too long.  However, shrinking the time too slowly does slow down the student’s mastery of the skill.  

3. Use Data
You need to make decisions about amounts of time you are delaying and the type of prompt you are going to provide after waiting based on the student’s performance in the past. One way to do this is to do a probe before your session and see which prompts are effective.  That way you know whether to respond for all your sessions that day with a partial physical prompt or just a gesture or verbal prompt.  It doesn’t guarantee that you won’t have errors, but if you use your data you will be more likely to limit errors and not move too slowly.

4. Establish time intervals that are the same for after the direction and after the prompt
You need to play for 2 intervals in which there will be a delay.  After your initial trials in which you prompt immediately, when you start to fade the prompts, the first delay will be right after the direction.  The second will be if the student doesn’t respond to that first prompt.  Neitzel and Wolery (2009) make a good point that keeping the time you delay in each of these intervals the same will be easier to remember and implement.

5. Differentiate reinforcement based on response

Finally, as with all prompt fading strategies, it is critical that you reinforce more powerfully when the student is more independent than if a prompt is needed.  Time delay gives you the opportunity to provide that reinforcement effectively because it gives the student the opportunity to be independent on each trial as you institute the delay.
So, again there is a lot more to know about time delay than what is covered in this post, but the NPD document by Neitzel and Wolery (2009) provides a nice step by step and more consideration.  Time delay fading is a great strategy to use for verbal trials, in particular, in which it is difficult to break the prompts down into smaller components. I can’t physically prompt a student to talk so I’m limited in my types of prompts.  Time delay is a great way to fill that gap.
Have you use time delay to teach your students?  What are your pointers?  Please share in the comments!

Resources

Share it:

Email
Facebook
Pinterest
Twitter

Unlock Unlimited Access to Our FREE Resource Library!

Welcome to an exclusive collection designed just for you!

Our library is packed with carefully curated printable resources and videos tailored to make your journey as a special educator or homeschooling family smoother and more productive.

Free Resource Library