Welcome to the Autism Classroom Resources Podcast, the podcast for special educators who are looking for personal and professional development.
Christine Reeve: I’m your host, Dr. Christine Reeve. For more than 20 years, I’ve worn lots of hats in special education but my real love is helping special educators like you. This podcast will give you tips and ways to implement research based practices in a practical way in your classroom, to make your job easier and more effective.
Welcome to Autism Classroom Resources Podcast. I’m Chris Reeve, and I’m your host. And we are in the midst of a series on five tips to start your year off right in different areas. Two weeks ago, I talked about the five things to kick off the year the right way in teaching special needs classes, or to special needs students.
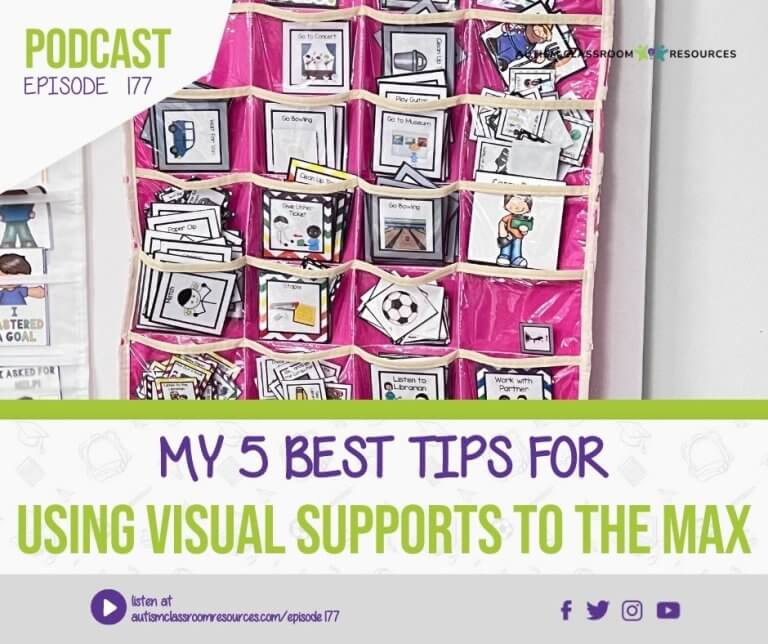
And today, I’m going to focus on my five best tips for using visual supports. We’re going to go beyond just simple picture schedules. And we’re going to focus on the types of visual supports that can be really helpful whenever there is a change or transition, like the beginning of the year. Plus, I’ve got some free visual support for you to use in your classroom that can help you get started with them. So let’s get started.
I talked two weeks ago in Episode 175, about having more visual supports available than you think you need. And that’s a free one. It doesn’t fit into any of my five for today. But you always want to make sure that you have more visuals than you need because the time it takes to either find or make the visual you think you need can be time that you lose that tenuous thread of engagement that you had going for a moment.
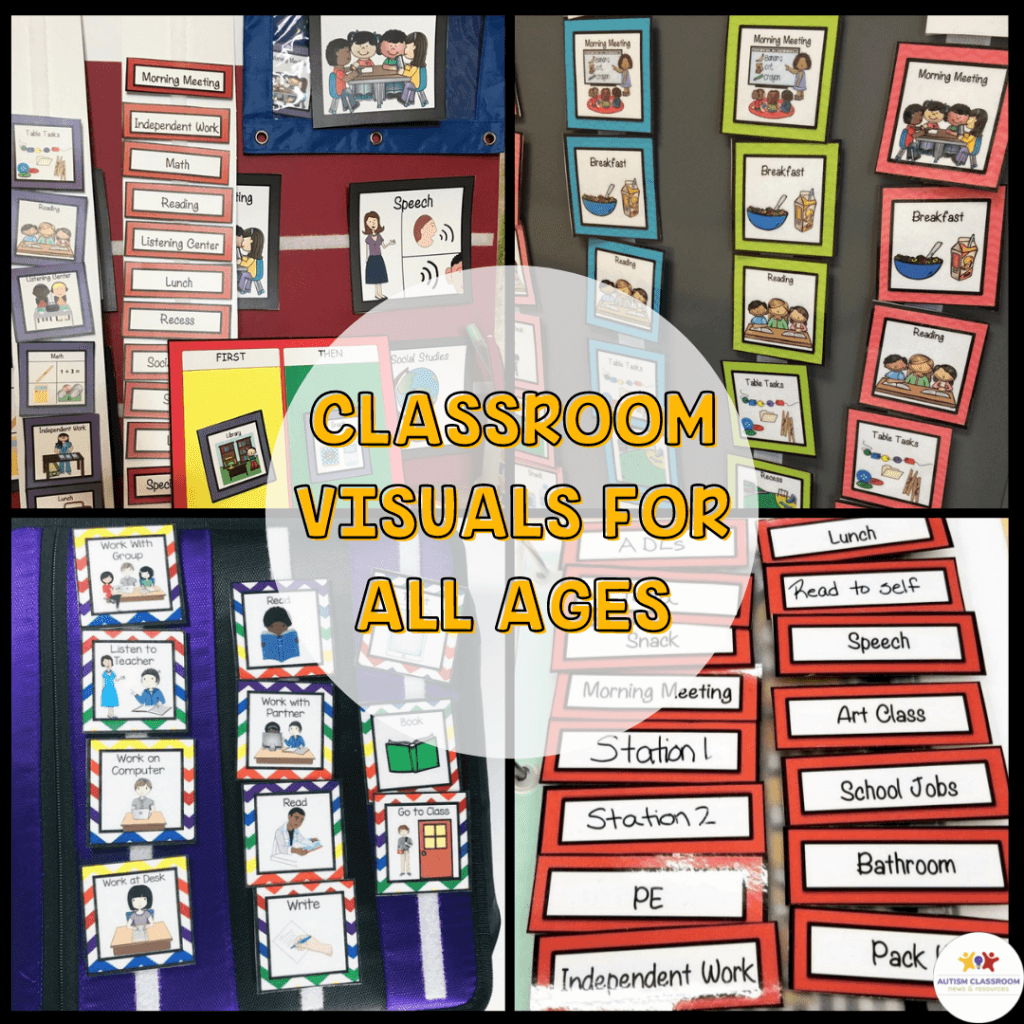
Now my first tip for today is not going to be that hard to figure out if you have listened to the podcast for a while. You want to make sure you have your visual schedules in place. visual schedules come in many different types and forms. They can be written lists, they can be representative objects. Frequently, we use picture symbols, those are actually kind of my default. If I don’t know where to start, that’s where I start.
You might make them using Boardmaker, or Smarty Symbols or the unique version of visuals that is eluding me in name right now. Or you might use my visual schedules that are a combination of symbols and clipart. But whatever type of visuals you have, think about having a backup. Maybe you think that all your students are going to be able to handle a written schedule, but you find that Sam isn’t going where he’s supposed to go. And he doesn’t really seem to understand it. It’s really helpful at that point to be able to put your hands on a picture schedule and try that. So even if you didn’t think you needed it, it’s sometimes helpful to have that as a backup.
Or maybe you have a student that you thought would do well with a full day schedule on the wall. But then you find out that he doesn’t really understand the pictures and taking him back and forth to the wall became another transition.
I had a guy just like this, and checking his schedule at each transition really made his behavior start to deteriorate through the day. It’s really nice at that point that we were able to pull out a folder with a first then board on the front or notebook that you can just Velcro a first then board on the front, and pull all his visuals into that notebook so that we could present him just first we’re going to do this, then we’re going to do this. And then for the next one, then move to first. First we’re gonna do this, and then we’re going to do this. And when we did that, his eyes lit up like Oh, I get this now. And his behavior was so much better because he understood and we didn’t have that extra transition.
So having a backup handy or having a variety of visuals schedule tools that you can use because you don’t always really know what kind of schedule is going to work for each student can be really, really helpful.
Number two, look around your room and think about where you might need more visual supports. Here’s some questions that you might want to ask as you think about that. Do your students know where to line up and how far apart to stand? Or are they all over each other in a great big mob at the door? If that’s what’s happening, then think about putting feet for young students, cut outs to feet or shapes on the floor and space them out how far you want them to stand away from each other. If you’ve got space longer than their arm is usually a good measure to use. So it’s a little harder for them to get off their spot and reach for another student.
I always forget this one, until the first day of school comes around. And I watch all of the students crawling all over each other in an attempt to line up, and I think I ugh, forgot them again. And if you have never used these kinds of visual supports to help students know how and where to line up, it truly is the closest thing I have to magic. I mean, you put paper on the floor, and the kids go and stand on it. And they’re like, I’m in my spot. If you have kids that shouldn’t be next to each other, put their names on them. Otherwise, I just leave them blank and they can get on whatever spot they want. But they’re on their spot.
Another question to ask yourself, as you look at your classroom, do you know where do the students know where to sit when they come to a group activity? Or are they sitting too far away? Or if they’re on the floor, are they sitting on top of each other? Again, think about putting some kind of marker on the floor to show them where they should be sitting.
Now, there’s a company that makes something called Sit Spots that can be used for this, you can also use them for feet, I think they actually have feet cut out. But you could also just make your own, use of visual shape or a color on the floor. I use really clear Scott packing tape I found to be the most durable. And it’s amazing how well it lasts. Sit spots are really helpful if your admin won’t let you put tape on your floor, though. Some preschool rugs have this built in with squares or animals need and say go sit on the squirrel, go sit on this shape.
And if you think that your kids are too old for this, I want you to think about theater seating. When you go to a play or a concert, the seat typically has a row and a number on it that tells you where to sit. We all use visual cues every day, we just don’t always realize that that’s what we’re doing. So if you’re working with older students put numbers down on the floor for where their chairs would be.
Next step, are there places in the room that the students are not allowed to go without permission. This might be a teacher area, or where the staff store their personal materials. It’s okay to put a visual up that tells them what area is off limits or what is closed. Put a closed sign on it or put a barrier of some type and a sign that says closed or no entry.
And again, we have all these all the time in our communities. We have a door that says authorized staff only, for instance, that’s clearly a visual cue. So look around for things like those kinds of things that could become problem areas and then think about what you can do to make it visually clear by just putting a visual support in place.
My third tip is to have a variety of behaviorally related visuals around the room. Now I like to have, in most of the classrooms that I’ve worked in, many of them have some students that are struggling with challenging behavior, they’re learning to communicate instead, many of them have communication challenges.
So one of the things I do regularly is every table has a piece of Velcro on it. And again, you have to be creative if you can put Velcro on your furniture, but I’ll have a asking for a break visual, and I need help visual,a nd sometimes I’ll have a talk to me visual on each table. And this allows it to be in easy reach of a student who’s working on those skills as a replacement behavior in the behavior support plan. But it’s also easily available for staff to use to visually prompt those replacement behaviors or visually redirect a potential problem.
I also start the year with a set of classroom rules on every table or every teaching area. And this helps remind all of us staff and students to review them. And again, it’s really good to have them available again, because you can use them as a positive way to redirect problem behaviors by showing them and reminding them of the rule that is related to those.
Number four, and this might not be the first thing that you make sure you have at the very beginning of the year, but when you get some time it’s worth doing. Put pictures or symbols or just written labels depending on the level of your students, on the cubbies, on the bookshelves, on the cabinets of what goes in that spot.
My mother used to say, yours may have too, if everything has a place then it will all go back to the right place. And as I’ve gotten older, I have realized that once again my mother is right.
First, when there’s a designated place for something, it is more likely that we will put it back in that specific place. It is amazing how that happens. Just a little thought that’s needed if it doesn’t have a designated place to go, and we have to try to figure out what to do with it, that’s enough to get many of us off task from putting things away. That is true of our students as well. But if you have pictures of where the items go, there’s a designated place that it’s supposed to be or a label or whatever.
That means that when you tell someone to clean up, just putting all the items on top the counter is not cleaning up. It makes cleaning up much more concrete, to clean up means to put things back where they belong.
And here’s the secret weapon of this use of visual supports. This is helpful not just for students, but also for staff. First, we are all more likely to put things in the right place when there’s a designated place to put them. But it also helps staff to know where they can find things that they need during the day.
For instance, if you put visuals on the cabinet doors of what’s inside, you could go right to the one that you need, open it, and get what you need. If I don’t know where things are kept and I work in your classroom, I have to open multiple doors and rummage around. And eventually, if I don’t find it, I’m going to have to ask the teacher to find what I need. And that means that the teacher has to stop attending to what they’re doing, perhaps they’re working with the student, and help the person find the thing that they’re looking for.
So it just ties you up more and makes your staff more independent. Visual supports mean both staff and students can be more independent. In addition, they mean that staff is more likely to put things back where they belong, and that leads to less confusion.
And finally, my fifth tip is to store your visuals in an organized fashion. I have never heard a teacher say that they had too many visuals. But I have heard them say they can’t find the visuals that they thought they had or that they need. And I’ve often, often had that problem myself. So storing them in an organized way is even more key than just general supplies in the room.
So pick a method for storing them first. I’ve used tons of different ways. I typically at this point store students visual schedules by student who uses them. I color code visual schedules. I do that to help everybody know whose schedule is which, that allows me to easily put all the schedules back together again by putting the like color together, and it means that if I find the pieces elsewhere, I know if I find them on the check-in board, I know who’s in that activity and who’s not using their schedule correctly.
So that’s why my visual sets in my TPT store all have at least 15 colors of each schedule. It makes organizing the classroom for the students and the adults much easier by being able to put things back together as color. So I put the students visual schedules materials together by color.
But for behavioral visuals and other types of visual supports, I put like visual with like visuals. So I often store visuals together that are for the same task. So if I have a sequence of tasks like a hand washing sequence or a arrival routine, those routines go together in the same container. But other than those, I keep visuals together by putting the picture of drink, all the pictures of drinks go together unless they’re on a student’s communication board. All this pictures of the play equipment go together.
And there are lots of different ways that you can store visuals. I’ve done a lot of them. The one that works best for me is to use jewelry hangers. They have very small compartments that can be used for stacks of visual and they’re small enough that most visuals fit in them and you can get a lot all on one organizer. For larger visuals, I use hanging shoe bags.
In both of those kinds of hanging storage, I love that I get it off the surfaces. They come with hangers so they’re easy to hang on the wall or the door, and they’re easy to go to and see what you need and get what you need because the pockets are clear.
You can also use pocket charts. My only issue with them is that they typically have lines of places to put the visuals rather than individual spots. And often the clear part isn’t as high so it’s easy for the visuals to fall out. So sometimes that leads to them getting all mixed up but if that’s what you have, do that. Just make sure if you put it on a wall with Velcro you put a lot of Velcro on it because it will get very heavy.
So as I’ve said, I’ve used a lot of different systems over the years. I actually covered them in a blog post with pictures of different ways to do it. And I’ll make sure that that’s linked in the show notes.
Finally, I have a bonus tip for you. Start with pre made schedules. Whether these are schedules that you found on the Boardmaker share site or if you bought one of my classroom visual bundles on TPT, starting with a set that’s already made, will save you a ton of time. And if you can make sure that you have visuals that you might not have thought of, it also really helps. So you may not have realized that you were going to need a particular visual, but it was in the set so it got made.
The visuals that are included in my visual sets were selected over 10, 15 years of setting up classrooms across the country for all different ages. And over time, we got really good at kind of knowing what our big set of visuals needed to be. And I’ve actually added a few over the years that people have requested.
Having them ready to go made it so much easier to set up a classroom and pull the visual quickly even if we hadn’t planned on neding it. My visual sets are designed to include individual picture symbols schedule visuals in multiple colors, some come and Chevron and polka dot and plain colors. That way I can individualize it.
There are word visuals for students who still need to carry a word with them, their readers, but they still need that transition piece to go to the area. And there are check in and group schedule visuals that match those pictures, but they’re larger, so you can see them across the room.
And in addition to those schedules, there are behavioral visuals that include classroom rules, a visual lanyard that matches the rules so we’ve got them for redirection, there are classroom jobs, and there are a number of other things in there as well. So having a set that all you have to do is print, cut, and laminate, which I know is enough work by itself, is so much easier than trying to track down the pictures and adding them to a list having to add to them.
I’ve been doing some updating of products and finding that perfect picture can take you forever. Your pictures don’t have to be perfect. But if I’m making them for you, they do. You can find all of my visual support sets in my store at autismclassroomresources.com/visuals. And that’ll actually take you to my TPT store. There are sets of younger and older students and I’ll make sure that I include the link in the show notes as well.
So those are the five, or rather the six, tips for using visuals to start your year off right. I hope that you’ll join me next week when I am going to be talking about my five best tips for effectively using reinforcement in the classroom. And no, that does not mean that we’re giving cookies to students all day long.
Until then, grab some free mini schedules for Fall field trips in the free resource library at autismclassroomresources.com/pumpkin.
I hope that these tips have been helpful for you. If you listen to the podcast, it would mean the world to me if you went to Apple podcasts and left a review. I would love to know your thoughts about it. And that helps other people find it. Until next week, I’ll be sitting here wondering how many of you find sushi reinforcing. Want to know more? Tune in next week. Talk to you soon.
Thanks so much for listening to today’s episode of the Autism Classroom Resources podcast. For even more support, you can access free materials, webinars and Video Tips inside my free resource library. Sign up at autismclassroomresources.com/free. That’s F-R-E-E or click the link in the show notes to join the free library today. I’ll catch you again next week.