It’s hard to believe, but it’s that time again…..time for the monthly Workbasket Wednesday Linkup! That time when I go back into my vault and try to find pictures of workbaskets I’ve collected over the years to share. And then I throw it out there for the month for other bloggers (and nonbloggers) to link up with pictures of their newest or favorite classic work baskets. And then we all get to see them and share ideas–and you know me–I’m all about sharing! So, here we go–see the link directions at the end of this post.
This month I thought I would focus on packaging tasks. I love them because they are a bit more complex but they lead to jobs that can be done around the school and on the worksite. They can be done with visual supports or without, depending on the need. And, for these tasks, there are no materials that you can’t find at the Dollar Tree or for free.
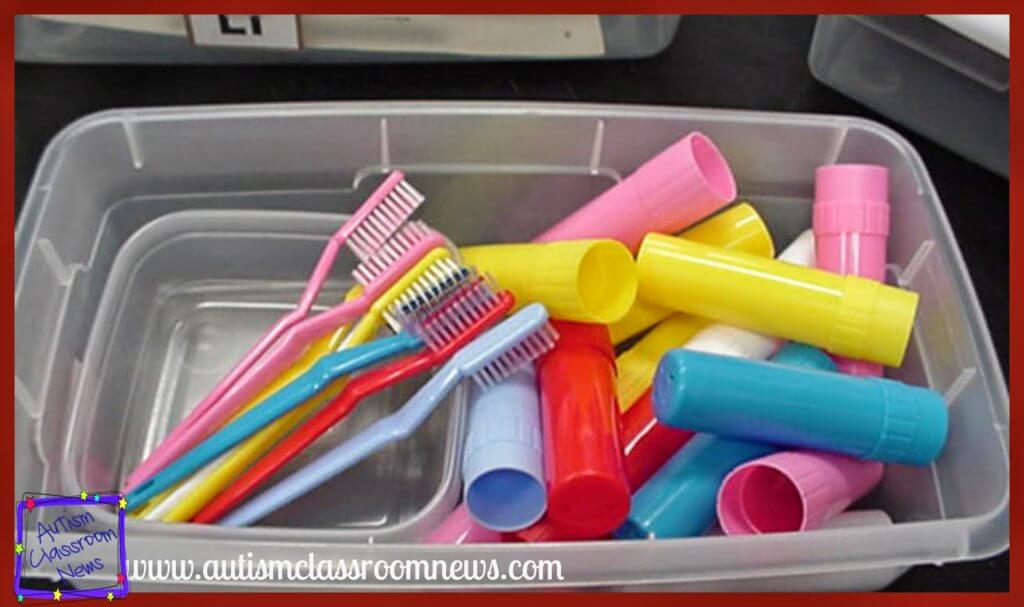
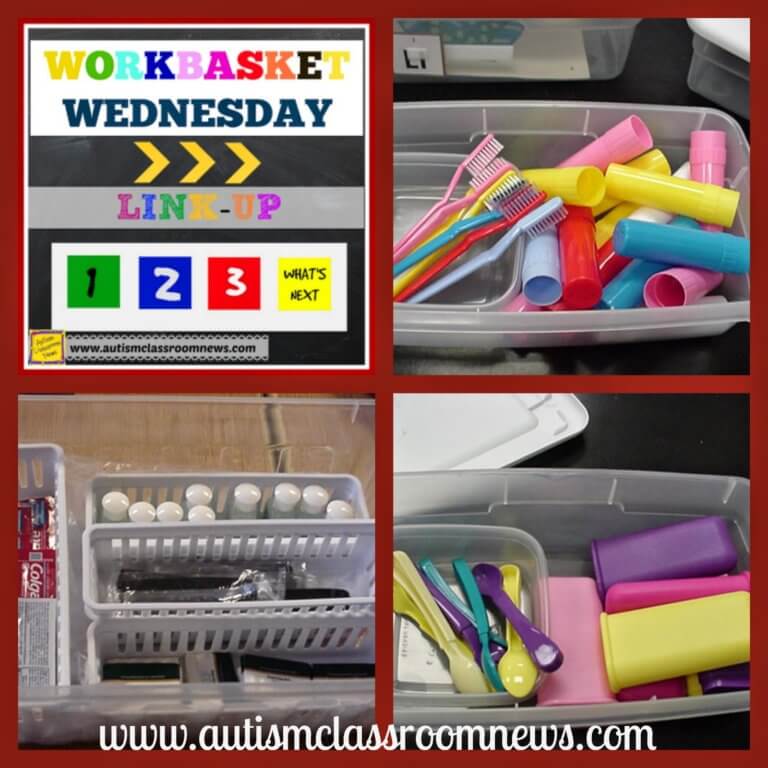
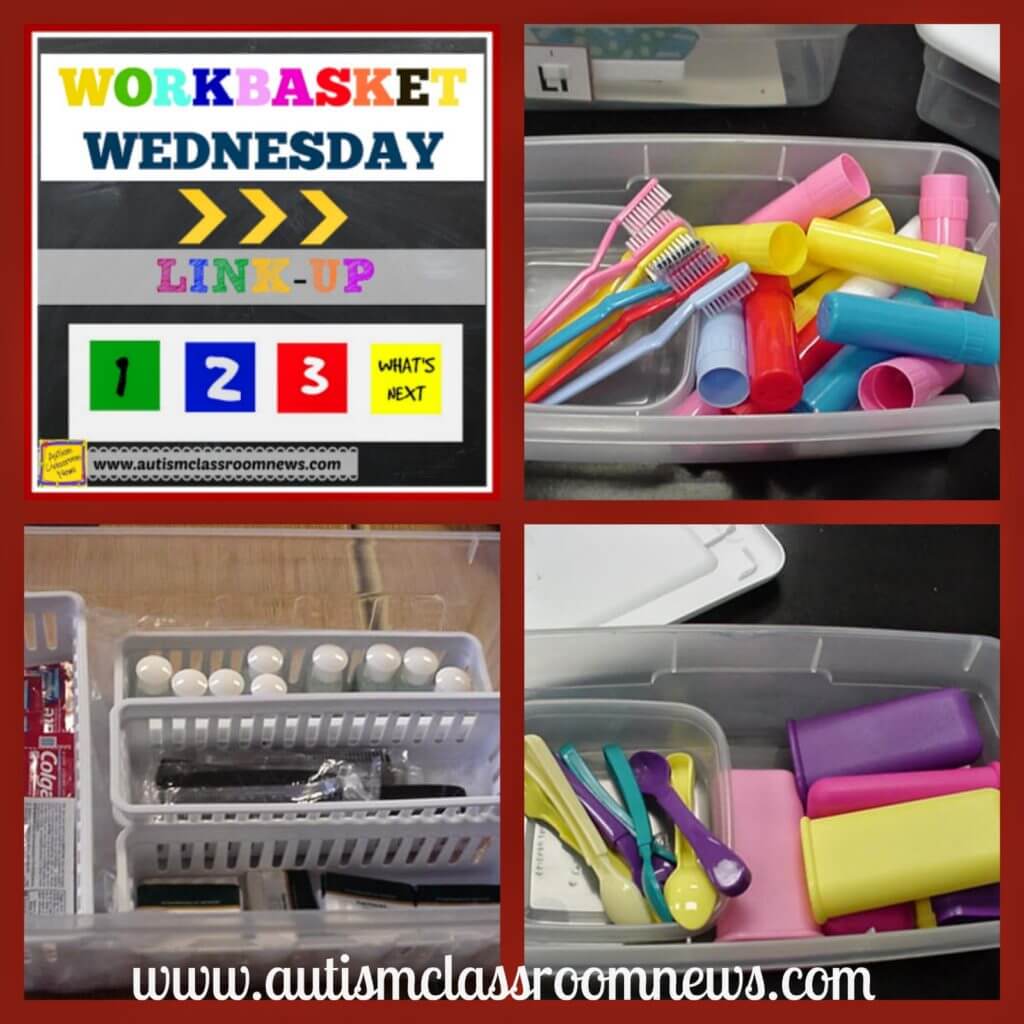
This is one of my favorite classic tasks. It’s so classic, that I buy these every time I go to the Dollar Tree and whenever I set up a middle or high school classroom, they are on my list. These are travel toothbrush holders. You can usually get 3 for $1 at the dollar store. You can use them with or without the toothbrushes, although obviously it’s much more functional with them. In the example above you can see we pulled the toothbrushes out in their own container, but for some students I would separate out the ends of the holders themselves. In this picture part of the task is finding the sides that fit together. So, obviously the students put the toothbrush in the one end of the container and then find the top. I like to make it so they have to match the toothbrush to container colors too.
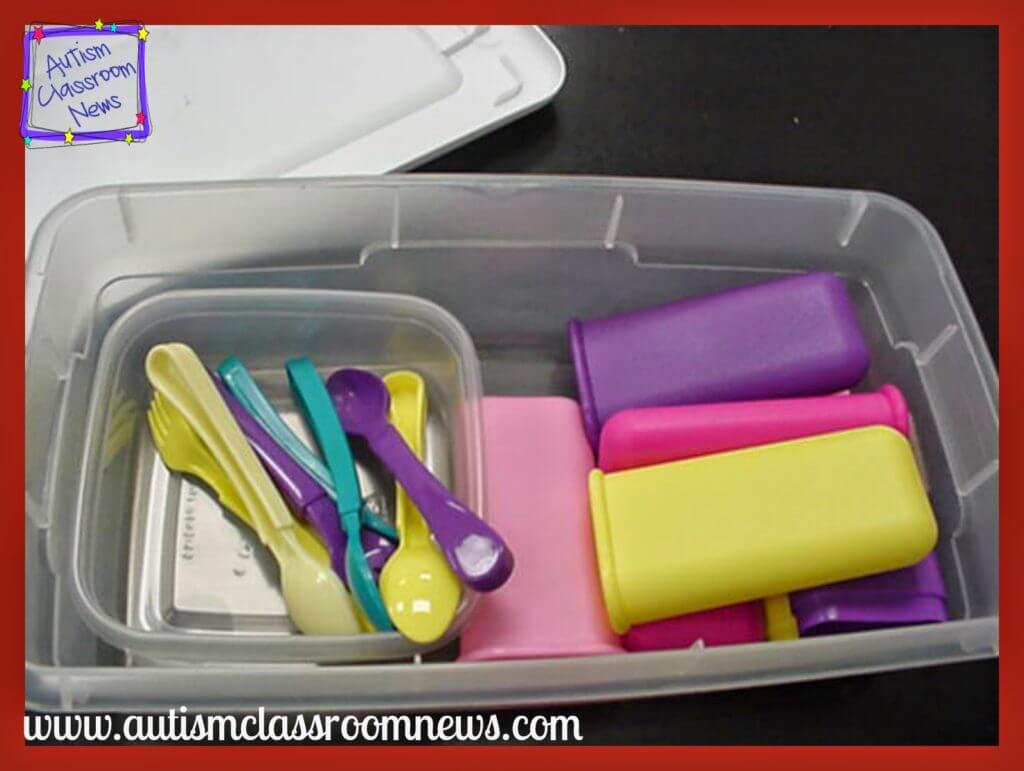
This one is a little more unusual but also can be found at the dollar store. It’s baby feeding travel kits. Again the students can match by color and assemble the kits by taking a spoon and putting it in the container and then put the top on. I think there are typically multiple spoons in a case. Again, an easy one that you can put in a bin and be ready to go.
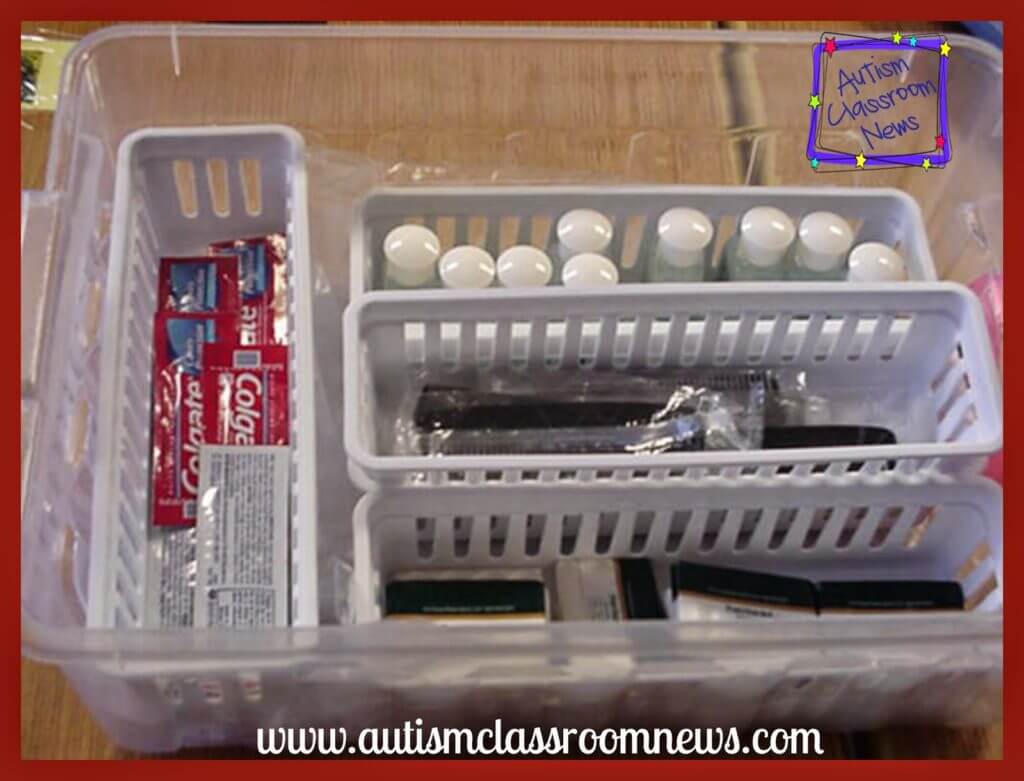
This one takes a little more effort. These are hotel toiletries and the student has to take one of each material and put them in a baggy to make a travel kit. Some students might do well with a visual template for this, which you could make by putting the materials you want in each bag on a copy machine or scanner and essentially copying them or making a picture for them to match to. You can monitor which items to include based on how many items the student can manage independently. One of the things I’ve always loved about this picture is the organization of the materials that it shows to make it easy for the student to know I take 1 of each and put them together and they don’t have to search around. It also makes it easier for the teacher to make sure that there aren’t more of one material than another which would confuse a student when they run out. You can get these kinds of materials by going to the travel aisle of a drug store or grocery store, but even better (and what this teacher idd) go to a local hotel and ask them if they would be willing to donate soap, shampoo, conditioner, toothbrushes and toothpaste that they keep for travelers who forget something for you classroom. Many of them would be happy to help and it’s a pretty small donation to request. And, I love the fact that it’s real-life materials making something that I could see someone needing to make to have ready travel kits at a hotel front desk to hand out to guests who lost their luggage, etc.
So, those are my workbaskets for the month. What are yours? Please share them by following the directions below and I will share them on all my social media to get those ideas out there!

1. Write a blog post with pictures of workbaskets (no store links)
2. Grab the button above and put it in your post to link back to this post
3. Add your post to the linky below.
4. Check out the other posts linked up and leave comments if you like them.
If you aren’t a blogger, share your pictures by emailing them to me, pinning them to Pinterest and including the link in the comments below, or sharing them on my Facebook page.
Until next time,